
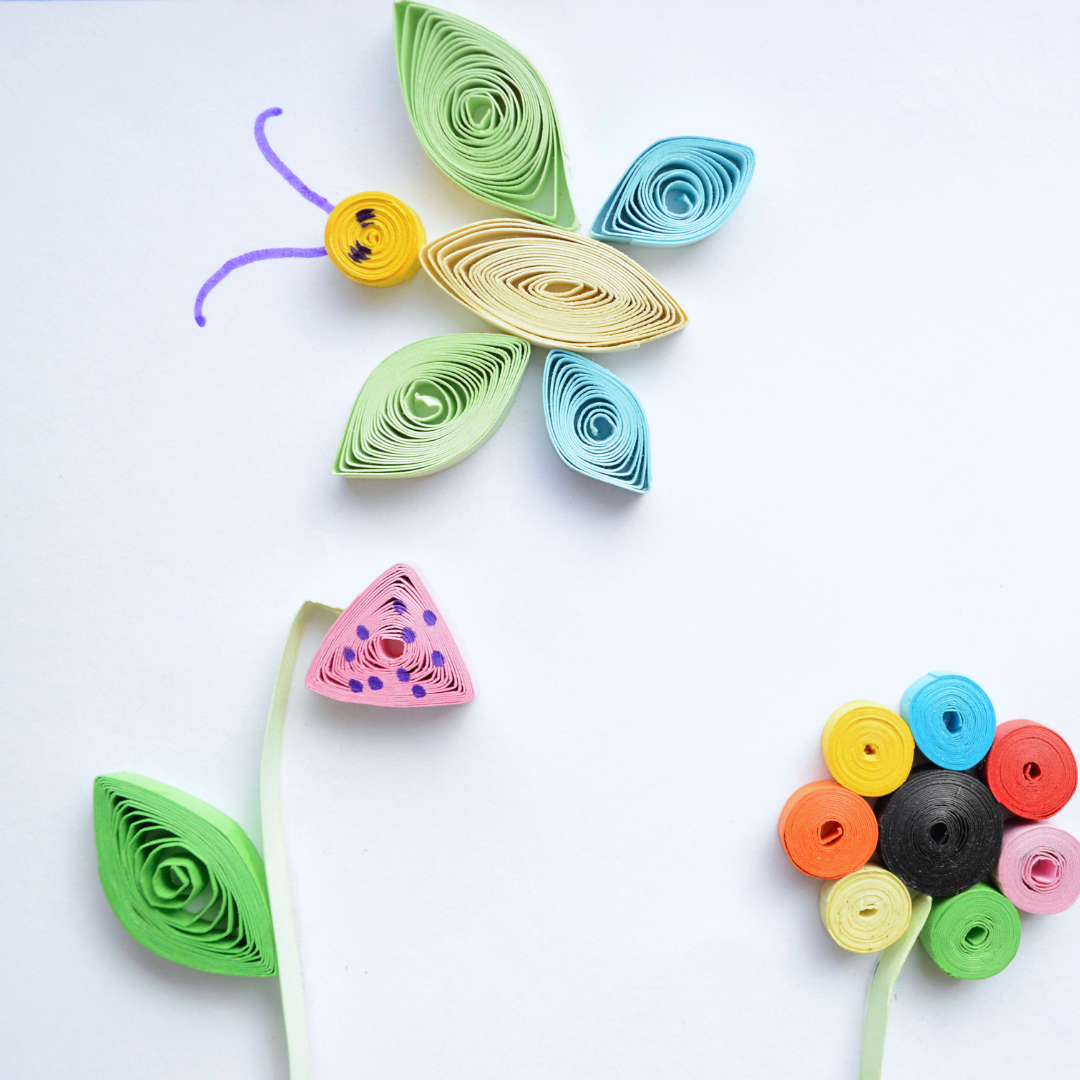
Paper quilling is a creative craft that uses rolled and shaped strips of paper to form decorative designs. To start paper quilling, you need basic tools like quilling paper strips, a slotted tool or needle, glue, and a surface to work on. With these simple supplies, you can create intricate patterns and art pieces.
Understanding basic shapes, such as coils, teardrops, and scrolls, is essential for building your skills. Once comfortable with these shapes, you can combine them into more complex designs that reflect your personal style.
This craft is accessible to beginners and requires minimal investment, making it easy to try. Learning a few fundamental techniques will unlock endless creative possibilities in paper quilling.
Essential Paper Quilling Tools and Materials
Starting paper quilling requires specific types of paper and tools that make shaping and securing the strips easier. Paper quality, tool precision, and optional supplies can impact the overall experience and the finished design.
Choosing the Right Paper Strips
Paper strips vary in width, length, and color. Beginners often start with pre-cut strips measuring 1/8 inch (3mm) wide. These are thin enough for detailed designs yet strong enough to hold shapes.
Look for acid-free paper to prevent yellowing over time. Bright, solid colors or metallic finishes work well for most projects. Cardstock or scrapbook paper usually isn’t flexible enough for quilling.
Length typically ranges from 17 to 24 inches. Longer strips can create larger shapes, but shorter strips are easier to handle for complex patterns. Experiment with different widths as you advance.
Must-Have Quilling Tools
A basic quilling kit includes:
- Slotted quilling tool: Holds the strip securely while rolling.
- Needle tool: For fine shaping and adjusting coils.
- Tweezers: To place and hold delicate pieces.
- Glue with fine tip: Allows precise application and quick drying.
A ruler and scissors are also essential for cutting and measuring paper strips. Using a slotted tool is easier for beginners compared to needle tools alone.
Optional Supplies to Enhance Your Projects
Additional items can improve your workflow and finished look:
- Circle sizer board: Helps create consistent coil sizes.
- Quilling comb: For making loops and repetitive patterns.
- Curling coach: Assists in making uniform coils and shapes.
- Workboard with pins: Holds work steady when gluing shapes.
- Varnish or sealing spray: Protects finished quilled art from dust and damage.
These supplies are not necessary but help increase precision and the variety of achievable designs.
Basic Techniques for Beginners
Understanding how to form shapes, apply glue, and maintain consistency is essential for creating clean and polished quilling projects. Mastering these skills will improve both the appearance and durability of your designs.
Creating Basic Quilling Shapes
Start by tightly rolling a strip of paper around a quilling tool or toothpick. Once you release it gently, the coil will loosen into a circle. Pinch one or both ends of this circle to create shapes such as teardrops, marquises (eye shapes), and squares.
The key is controlling the tension when you roll and how much you loosen the coil. Practice rolling evenly to avoid uneven shapes. Use fingers or tools to fine-tune the shape edges. These six basic shapes form the foundation for more complex designs.
How to Glue and Assemble Quilling Pieces
Use a precision glue applicator or a toothpick to apply a small amount of clear-drying glue. Applying too much can cause lumps or make the paper soggy. Dab glue inside the coil to secure its shape first, then connect individual shapes by applying glue on edges or tips.
Allow glue to dry under a light weight to keep shapes flat and prevent warping. For multi-layered designs, glue pieces one layer at a time, letting each dry partially before adding the next. This avoids shifting and maintains alignment.
Tips for Consistent Shaping
Use a template board or quilling comb to get uniform sizes for coils and loops. Measure strip length and roll size to keep shapes consistent. Roll strips at a steady pace and apply even pressure on the quilling tool.
Keep your hands clean and dry to avoid paper bending or tearing. Store paper strips flat to prevent warping, which affects shape making. Regular practice builds muscle memory, helping to produce repeatable results faster and with less effort.
Designing Your First Quilling Project
When starting paper quilling, choosing the right project helps build skills and confidence. Focusing on simple shapes, clear layout plans, and balanced color use sets the foundation for a successful design. These steps guide your creative process and keep your work organized.
Selecting a Simple Project Idea
Pick a project that uses basic quilling shapes like coils, teardrops, and scrolls. Avoid complicated patterns that require advanced techniques or too many pieces. Designs such as a small flower, a leaf motif, or a geometric pattern work well.
Aim for projects that highlight form and symmetry without overwhelming detail. This approach lets you practice rolling and shaping paper accurately. Start with a size manageable within an hour or two to maintain focus.
Planning Your Layout
Before gluing, sketch a rough outline of your design on paper. Place your quilled shapes on the sketch to visualize spacing and balance. This prevents overcrowding and helps you arrange elements cleanly.
Consider the negative space—the blank areas around your pieces—as part of the design. Consistent spacing enhances the overall look. Mark where each shape goes, so you avoid guesswork during assembly.
Color Coordination Basics
Limit your palette to 2-3 colors to keep the design coherent. Combine contrast and harmony, such as pairing a dark shade with lighter tones of the same color. Bright colors can highlight key parts, but avoid clashing hues.
Organize colors based on the design’s focus points. Use one color predominantly and others as accents. This strategy draws attention effectively and avoids visual clutter.
Step-by-Step Guide to Assembling a Paper Quilling Artwork
Proper placement and attachment of quilled shapes are crucial to create a balanced and sturdy design. Attention to detail during these final steps ensures the artwork holds together and maintains its form.
Arranging Quilling Shapes on a Base
Begin by selecting a sturdy base such as cardstock or canvas. Lay out your quilled shapes loosely on the base without glue. This lets you visualize the composition and make adjustments easily.
Arrange shapes by size and color to create contrast or smooth transitions. Leave small gaps between pieces to define each element clearly. Use tweezers for precise placement, especially with smaller coils.
Once satisfied with the layout, photograph the arrangement or lightly mark key points on the base. This will guide the permanent gluing step.
Securing and Finalizing Your Artwork
Use a precision-tip glue applicator or toothpick to apply glue sparingly. Dab glue on the base rather than on the quilled pieces to avoid excess.
Press each shape gently onto the glued area and hold for a few seconds. Work methodically across the design to maintain even drying.
Allow the artwork to dry flat under a light weight to prevent warping. Clean any glue residue with a damp cotton swab before it dries completely.
Troubleshooting Common Paper Quilling Issues
Common problems in paper quilling usually stem from shape inconsistencies, delicate paper handling, or glue application. Addressing these issues with targeted techniques can enhance the quality of your work and reduce frustration.
Fixing Uneven Shapes
Uneven shapes often result from inconsistent rolling tension or paper strips of varying width. To fix this, ensure a steady grip on the quilling tool and roll the paper evenly, keeping consistent pressure throughout.
If the shape is irregular after rolling, carefully pinch or adjust the coils before applying glue. Using a slotted quilling tool helps maintain uniform loops. Additionally, trimming the edges of strips before rolling can prevent bulging or uneven ends.
Practice rolling basic shapes multiple times to develop muscle memory for consistent size and shape. Recording dimensions or using templates can aid in repeating specific sizes.
Preventing Paper Tears
Paper tears primarily occur when the paper is too thin or when it is pulled or manipulated too roughly. Choose quilling paper with moderate thickness—typically 120 to 160 GSM is best to avoid easily tearing.
Handle the paper gently during rolling and shaping. Avoid sharp bends or excessive stretching, as these weaken the fibers. If a tear develops, it’s often better to start fresh rather than patch it.
Moisture or humidity can also weaken paper. Store paper flat in a dry area to maintain its integrity. Using tweezers or tools with smooth edges reduces accidental snagging.
Managing Glue Residue
Excess glue can mar finished pieces, leaving visible spots or causing paper to wrinkle. Use a fine-tip applicator or toothpick to apply glue sparingly.
Apply glue to the end of the coil, not the entire strip, unless the design requires it. Press pieces gently together and hold for a few seconds to let the adhesive set, reducing the chance of spreading glue.
If glue does spill, wait until it dries partially, then gently lift off any residues with a sharp blade or tweezers. Clean hands and workspace help prevent accidental glue transfer.
Safety and Workspace Organization
Maintaining a well-organized and safe workspace helps improve focus and prevent accidents. Proper lighting, seating, and tool placement make quilling more comfortable and efficient.
Setting Up a Comfortable Crafting Area
Choose a clean, flat surface with enough space to spread out your materials. Good lighting is crucial; natural light or a bright LED desk lamp reduces eye strain. A cushioned chair with back support aids posture during longer sessions.
Use containers or trays to keep paper strips, tools, and finished pieces tidy. This prevents clutter, making it easier to find items and avoid paper cuts. A cutting mat protects your table and provides a stable surface for precise work.
Safe Handling of Tools and Materials
Handle quilling tools such as slotted tools, needles, and scissors carefully to prevent injuries. Store sharp tools safely when not in use. Always cut away from your body and keep fingers clear of blades.
Keep glue and adhesives in small, manageable amounts to avoid spills. Use non-toxic glue designed for paper crafts to minimize inhalation risks. Wash your hands after using adhesives and avoid touching your face during crafting.
Expanding Your Paper Quilling Skills
Building on basic shapes and designs opens opportunities to create more complex and detailed quilling projects. Developing new techniques and leveraging learning tools enhances your precision and creativity.
Exploring Intermediate Techniques
Intermediate paper quilling involves mastering shapes like scrolls, teardrops, and marquises with varied tightness to add texture and depth. Combining these shapes into 3D motifs and layered designs can elevate your work.
Techniques to focus on include:
- Fringing: Cutting strips partially to create a fringe effect, useful for hair or floral centers.
- Shaping with Tools: Using tweezers and quilling combs for consistent loops and coils.
- Curl Manipulation: Adjusting coil tension for different visual effects, such as loose coils for volume or tight coils for structure.
Experiment with color gradients by blending multiple paper strip shades in one project to add visual interest.
Learning from Online Resources
Online platforms offer tutorials that range in difficulty and style to suit your pace and interest. Websites like YouTube, dedicated quilling blogs, and forums provide step-by-step guides with photos or videos.
Key resources include:
- Video Tutorials: Visual demonstrations of advanced techniques, often with tips and troubleshooting advice.
- Printable Patterns: Downloadable templates that guide layout and piece placement.
- Community Forums: Spaces to ask questions and share feedback, which can accelerate skill building.
Joining online workshops or live classes can also provide structured learning and direct feedback from experienced quillers.
Creative Ideas for Displaying and Gifting Quilling Projects
Quilling projects can be displayed in many effective ways. Framing your designs under glass protects them and creates a polished look. Shadow boxes add depth and highlight intricate details.
For gifting, consider mounting quilled pieces on handmade cards or bookmarks. These are practical and personalized gifts. Adding a clear coating can increase durability.
Small quilled shapes can be attached to magnets or pins. These make unique and inexpensive gifts. Present them in simple gift boxes or clear cellophane bags with a ribbon for a professional touch.
Using a combination of layering techniques and contrasting colors enhances the visual appeal. You can also create themed collections, such as seasonal or floral sets, to give as cohesive gifts.
| Display | Gifting Ideas |
| Framed art | Handmade cards |
| Shadow boxes | Bookmarks |
| Wall hangings | Magnets |
| Decorative trays | Pins |
Be mindful of the fragility of quilled paper when packaging. Use tissue paper or bubble wrap to prevent damage during transport. Adding a small care note can guide the recipient on how to preserve the item.