
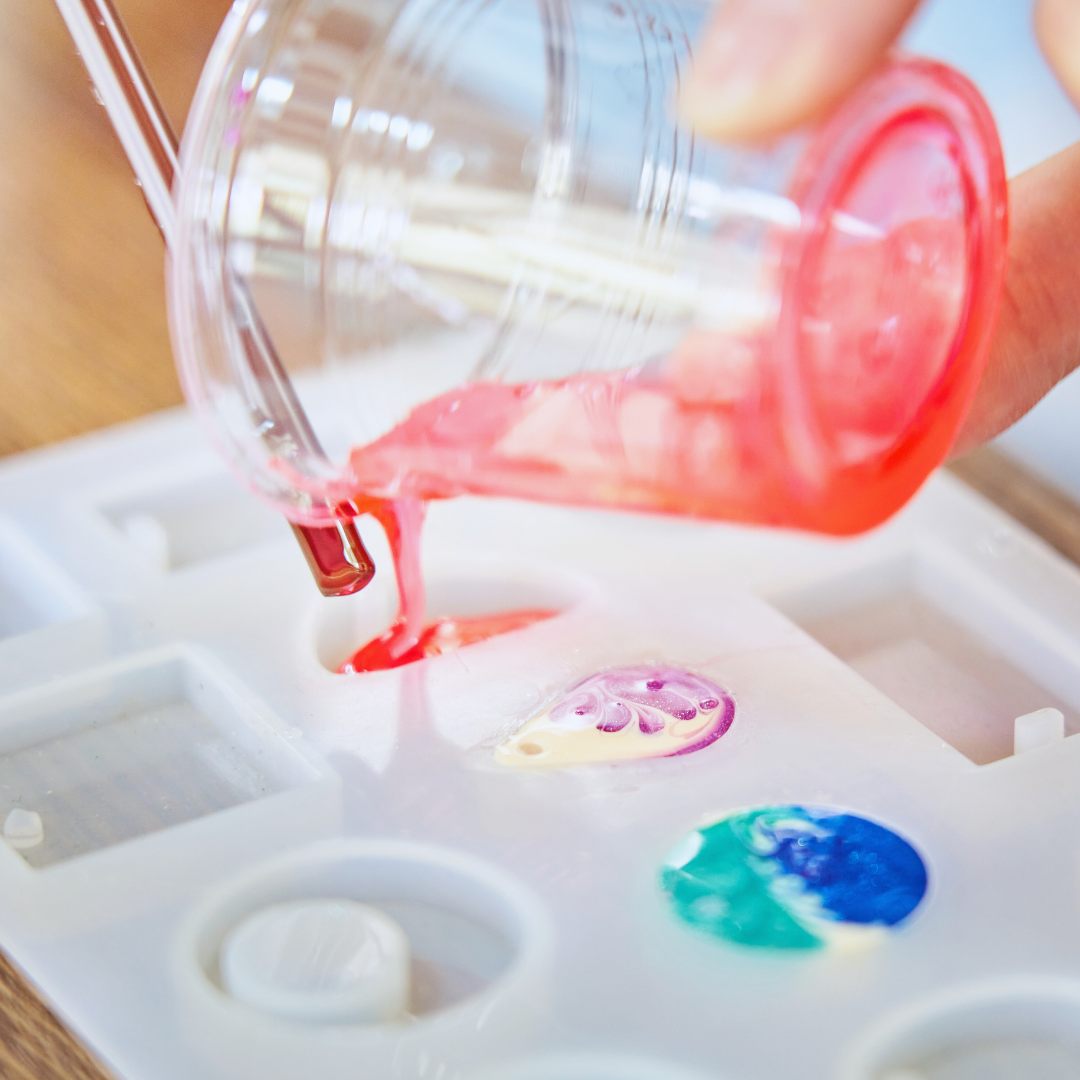
Bubbles in resin molds are a common problem that can ruin the clarity and smoothness of your finished project. The most effective way to prevent resin bubbles is to thoroughly mix your resin, apply slow and controlled pouring techniques, and use heat or pressure treatments to release trapped air.
Proper surface preparation and using high-quality molds designed for resin can also significantly reduce bubble formation. Understanding the chemistry of your resin and working in a controlled environment with minimal humidity helps maintain a bubble-free result.
Mastering these simple techniques will improve the quality and appearance of your resin creations, saving time and materials. Readers interested in detailed methods and practical tips will find value in exploring the full process.
Understanding Resin Bubbles
Resin bubbles form due to various factors during mixing and curing. These bubbles can appear in different shapes and sizes, each influencing the finished product’s clarity and strength. Knowing how bubbles originate helps in choosing the right prevention techniques.
Common Causes of Bubbles
Bubbles often originate from trapped air during mixing and pouring. Stirring resin too quickly or vigorously introduces air that gets caught in the liquid. Using cold resin or molds can also increase bubble formation by slowing the curing process.
Materials like silicone molds sometimes have a microscopic texture that traps air. Dust and debris in the resin contribute to bubble nucleation, creating more pockets of air. Environmental humidity can affect resin behavior, leading to condensation bubbles.
Types of Bubbles in Resin
There are mainly three types of bubbles found in resin projects:
- Air bubbles: These are trapped pockets of air formed during mixing or pouring.
- Volatile gas bubbles: Result from chemical reactions during curing that release gases.
- Surface bubbles: Appear on the resin’s outer layer when air gets trapped right before or during curing.
Each type impacts the final product differently. Air and volatile gas bubbles can weaken structural integrity. Surface bubbles primarily affect the finish and aesthetics.
How Bubbles Form During Curing
As resin cures, two processes create bubbles. First, residual air introduced earlier expands due to the heat generated in the exothermic curing reaction. This expansion causes small bubbles to grow.
Second, some curing agents release gases as byproducts. These gases form bubbles inside the resin mass. The speed of reaction and temperature control affect how many bubbles grow and how large they become.
Slower curing with controlled heat minimizes bubble formation by allowing trapped air to escape before hardening.
Preparing Your Workspace for Resin Casting
Setting up a clean, controlled environment is essential to reduce bubbles in resin casts. Attention to temperature, humidity, and mold cleanliness will directly impact the final quality of your piece.
Controlling Temperature and Humidity
Resin cures best between 70°F and 75°F (21°C to 24°C). Temperatures outside this range can cause uneven curing and trap bubbles.
Humidity should stay below 50% to prevent moisture from reacting with the resin, which leads to cloudiness and bubbles. Use a dehumidifier or air conditioner if necessary.
Avoid direct sunlight and drafts, as these create temperature fluctuations. Monitor your workspace with a digital hygrometer and thermometer to maintain stable conditions during the entire casting process.
Cleaning Molds and Tools
Dirt, dust, or leftover resin on molds traps air pockets when pouring. Clean molds with warm water and mild soap before each use.
Use a soft cloth or brush to remove residues without damaging the mold surface. Avoid oil-based or harsh chemicals, as they can degrade silicone molds.
Tools like mixing cups and stir sticks must be free of debris. Rinse them with isopropyl alcohol and dry completely before mixing resin to prevent contamination.
Store molds in dust-free containers to maintain cleanliness until casting.
Choosing the Right Resin and Mold
Selecting materials that naturally reduce bubble formation improves the quality of cast pieces. Equally important is choosing molds that allow easy air release and resist sticking. Both factors work together to minimize trapped air and defects.
Selecting Low-Bubble Resin Formulations
Resins with lower viscosity are less prone to trapping air during mixing and pouring. Polyurethane and epoxy resins labeled as “bubble-resistant” or “low viscosity” provide a smoother flow, allowing bubbles to escape more easily.
Some resins include additives or curing agents designed to reduce surface tension, further preventing bubbles. Always check manufacturer specifications for these features.
Temperature matters. Warmer resin flows better and can release bubbles faster. Avoid cold resin unless intended for specific effects.
Picking Quality Silicone Molds
Choose silicone molds that are flexible with a smooth, non-porous surface to prevent air pockets from forming. High-quality platinum-cure silicone often offers better durability and less tackiness than cheaper alternatives.
Molds with built-in vents or thin edges help air escape during pouring. Avoid thick and rigid molds that trap air underneath the resin.
Regular mold maintenance, like proper cleaning and coating with mold release spray, can also reduce bubble formation caused by trapped residue or surface imperfections.
Techniques to Prevent Resin Bubbles
Controlling air bubbles in resin starts with careful mixing, removing trapped gases, and precise pouring methods. Each process helps reduce or eliminate bubbles to ensure a clear, smooth finish in molds.
Mixing Resin Without Introducing Air
Mix resin slowly and steadily to avoid whipping air into the mixture. Use a flat stirring stick or silicone spatula rather than a whisk to minimize agitation.
Stir along the sides and bottom to fully blend the resin and hardener, scraping gently. Avoid vigorous scooping or rapid rotation that traps air bubbles.
Mix in small batches if possible. Overfilling the mixing container can cause more turbulence and increase bubble formation.
Temperature also matters. Mixing resin at room temperature between 70°F and 75°F helps maintain the proper viscosity to reduce air entrapment.
De-Gassing Resin Before Pouring
De-gassing removes trapped air bubbles after mixing. A vacuum chamber is the most effective tool for this process.
Place the mixed resin in the chamber and apply a vacuum to lower the pressure. Watch the resin expand as bubbles rise and pop, usually done within 2-3 minutes.
If a vacuum chamber is unavailable, letting the resin sit for 5-10 minutes can allow some bubbles to naturally surface, but it’s less effective.
Use caution to avoid prolonged or excessive vacuuming, as this can cause the resin to boil or lose hardness.
Pouring Techniques to Minimize Bubbles
Pour resin slowly from a height of about 6 inches to allow air to escape before the resin settles. Pour in a thin, steady stream rather than in large globs.
Start pouring on one side of the mold and allow resin to flow naturally to avoid trapping air pockets. Avoid shaking or moving the mold immediately after pouring.
Use a toothpick or pin to pop any visible bubbles on the surface. Gentle tapping of the mold on a solid surface also helps release trapped bubbles.
If possible, pour resin in layers, allowing each layer to partially cure before adding the next to minimize bubble entrapment at each stage.
Post-Pour Strategies for Bubble Prevention
After pouring resin into molds, certain techniques help reduce or eliminate bubbles trapped near the surface. These methods focus on releasing air quickly before the resin fully cures and ensuring a smooth finish.
Using a Heat Gun or Torch
Applying heat immediately after pouring resin encourages trapped bubbles to rise and burst. A heat gun or small butane torch is commonly used for this purpose. Hold the flame or heat source about 4-6 inches above the resin surface, moving it in slow, sweeping motions to avoid overheating or damaging the mold.
Avoid keeping the heat in one spot too long, as excessive heat can cause resin yellowing or uneven curing. Heat also temporarily lowers resin viscosity, allowing bubbles to escape more easily. For best results, apply heat within the first 10-15 minutes of pouring, while the resin remains fluid.
Vacuum and Pressure Chambers
Vacuum chambers remove bubbles by creating low pressure to expand and release trapped air before and after pouring resin. Place the mixed resin in the chamber and pull a vacuum for several minutes to degas the liquid fully.
Pressure chambers apply high pressure after pouring, compressing bubbles until they become invisible or pop due to pressure changes. A typical pressure setting is 40-60 PSI, maintained through the resin curing process.
Both methods require equipment investments but significantly improve clarity and surface quality, especially for larger or detailed molds prone to trapping air.
Troubleshooting and Removing Existing Bubbles
Bubbles in resin molds can appear on the surface or deeper inside the cast piece. Different methods are required to fix each type, focusing on careful removal and minimizing damage.
Identifying and Addressing Surface Bubbles
Surface bubbles are visible as small holes or craters on the finished resin. They occur when air gets trapped right at the resin surface during pouring or curing.
To fix these, use a heat gun or a small torch held briefly over the surface to pop bubbles before the resin fully cures. Be cautious to avoid overheating, which can distort the resin.
Alternatively, a toothpick or pin can be used to gently pierce and release bubbles while the resin is still tacky. For cured resin, light sanding followed by applying a thin layer of fresh resin can fill surface imperfections.
Repairing Internal Bubbles
Internal bubbles are trapped inside the resin, often invisible until polishing or cutting reveals them. These weaken the structure and harm clarity.
Drilling into the bubble is the first step. Insert a fine needle or pin to release trapped air. Afterward, inject clear resin or epoxy into the void using a syringe or dropper.
Allow the repair resin to cure fully, then sand and polish the area to restore a smooth, clear finish. Avoid excessive resin pouring, which can create new bubbles inside. Use slow and steady methods to reduce internal bubble formation during repairs.
Tips for Perfect Resin Casts Every Time
- Start with clean, dry molds to avoid contaminants that cause bubbles. Wipe molds with a soft cloth before pouring resin.
- Mix resin and hardener slowly and thoroughly. Stirring too fast incorporates air, increasing bubble formation.
- Use a heat source like a heat gun or torch to briefly pass over the resin surface. This helps release trapped bubbles early.
- Work in a warm environment, ideally between 70-75°F (21-24°C). Cooler temperatures slow curing and trap bubbles.
- Consider using a pressure pot or vacuum chamber if available. These tools significantly reduce bubbles in detailed casts.
- Pour resin slowly and from a height to minimize air introduction. Pouring in thin layers can help manage bubble formation.
Tips at a glance:
| Step | Reason |
| Clean molds | Prevent dirt or moisture buildup |
| Mix slowly | Avoid air bubbles |
| Use heat | Release trapped air |
| Maintain warmth | Speed up curing, reduce bubbles |
| Use pressure/vacuum | Remove bubbles efficiently |
| Pour slowly | Minimize air introduction |
Avoid shaking or transferring resin aggressively after mixing to reduce bubbles. Patience and a steady hand contribute to a smooth finish.