
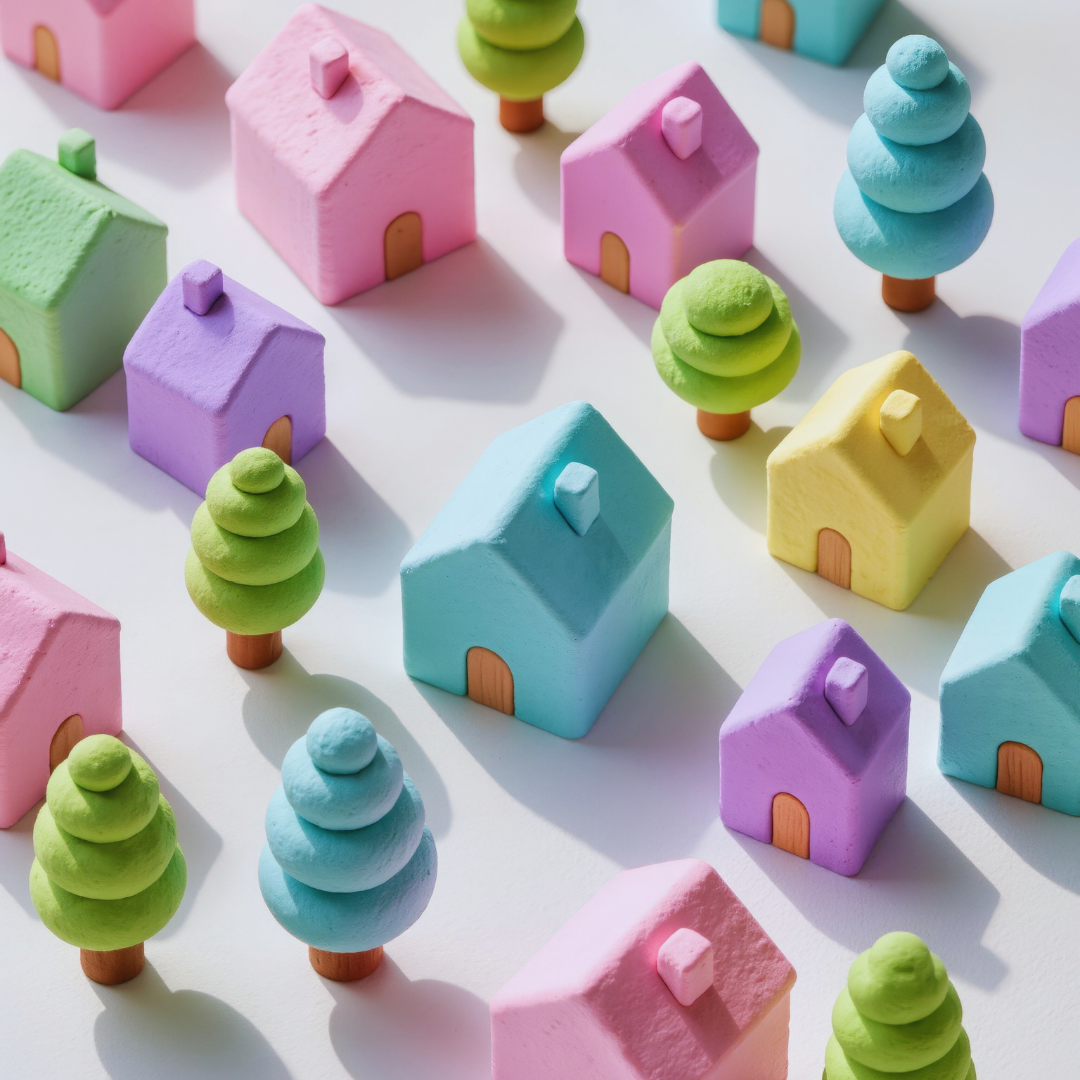
Polymer clay sculpting is a versatile craft that allows beginners to create detailed miniatures, jewelry, and decorative items with simple tools. The key to starting is understanding the properties of polymer clay and mastering basic shaping and curing techniques. This knowledge will enable you to bring your creative ideas to life effectively.
Working with polymer clay doesn’t require expensive materials or complex equipment, making it accessible to anyone interested in hands-on art. By learning the fundamentals, you can avoid common mistakes and gain confidence quickly, setting a strong foundation for more advanced projects.
Whether you want to make gifts, art pieces, or hobby items, polymer clay sculpting offers a rewarding experience through its flexibility and ease of use. This guide provides clear, practical steps to help you begin sculpting with confidence and success.
Understanding Polymer Clay
Polymer clay is a versatile crafting material that combines flexibility with durability. Its various types and brands offer different textures, colors, and baking requirements suited for diverse projects. The material’s ease of use makes it particularly suitable for beginners learning sculpting techniques.
What Is Polymer Clay?
Polymer clay is a synthetic modeling compound made primarily from polyvinyl chloride (PVC) particles and plasticizers. Before baking, it remains soft and pliable, allowing artists to shape and blend it with precision. After curing in a home oven (typically between 265°F and 275°F), it hardens into a resilient, solid form.
This clay does not contain actual clay minerals, so it doesn’t dry out like natural clay. It can be sanded, carved, drilled, and painted after baking. Available in numerous colors, polymer clay can also be mixed to create custom hues or translucent effects.
Popular Brands and Types
Three of the most widely used brands are Sculpey, Fimo, and Premo. Each offers unique qualities:
| Brand | Texture | Baking Temperature | Ideal Use |
| Sculpey | Soft, easy to blend | About 265°F (130°C) | Beginners, soft detail work |
| Fimo | Firm, holds detail | About 265°F (130°C) | Detailed sculpting, durability |
| Premo | Firm but flexible | About 275°F (135°C) | Jewelry, mixed media |
Each brand line includes varieties such as translucent, glitter, and metallic types that expand creative possibilities. Some are firmer, which works better for fine details, while others are softer and easier for general shaping.
Benefits for Beginners
Polymer clay is forgiving for new users due to its non-toxic nature and ease of handling. It doesn’t require water or special tools for basic shaping, reducing setup time. Mistakes can often be corrected by re-softening the clay or reshaping before baking.
The material’s affordable cost and low-maintenance curing process make it practical for learning and practice. Beginners can experiment with colors, textures, and simple techniques without much waste. Once cured, the pieces are strong enough for functional items or decorative art.
Essential Tools and Materials
Starting polymer clay sculpting requires a specific set of tools and materials that make the process smoother and more precise. Proper preparation, handling, and storage play a critical role in achieving clean, detailed results and maintaining the clay’s condition.
Basic Sculpting Tools
A good set of basic sculpting tools includes metal or plastic knives, shaping tools, and fine detail instruments. A needle tool is essential for creating textures and fine lines. Flat or curved silicone-tipped tools help smooth surfaces without leaving marks.
Dental tools or old brushes work well for adding detail and shaping tight areas. Avoid sharp metal blades with low-quality clay, as they may cause tearing or uneven cuts. A rolling pin or acrylic roller is necessary to condition clay and create even sheets.
Keeping your tools clean prevents color contamination and helps maintain precision over time.
Clay Preparation Surfaces
Choosing the right surface for conditioning and rolling polymer clay affects its smoothness and workability. Glass plates, ceramic tiles, and acetate sheets are popular choices.
Glass is non-stick, easy to clean, and heat-resistant, making it useful for baking final pieces as well. Acetate sheets are flexible and transparent, allowing for easy color mixing and cutting. Avoid porous surfaces like wood, which absorb oils and moisture.
Regular cleaning of surfaces prevents dirt or old clay bits from embedding in your current project.
Storage and Safety Supplies
Proper storage preserves unused polymer clay and finished pieces. Seal clay tightly in plastic wrap or air-tight containers to prevent drying out and dust accumulation.
Labeling different clay colors avoids mix-ups. Store in a cool, dry place to maintain clay consistency and extend shelf life.
Safety essentials include dust masks when sanding cured pieces and nitrile gloves to protect skin during extended work sessions or baking. Good ventilation is important to avoid inhaling fumes when curing.
Getting Started With Sculpting
Before shaping polymer clay, it’s essential to prepare the material for durability and ease of use. Understanding basic handling and shaping techniques will improve the quality of your work while saving time. Familiarity with these steps helps create clean, well-formed pieces.
Conditioning Polymer Clay
Conditioning is the process of softening polymer clay by kneading it until it becomes pliable and smooth. This makes the clay easier to shape and reduces the risk of cracks during baking. Use your hands or a pasta machine to condition the clay, working it until it feels evenly soft throughout.
Avoid over-conditioning as it can make the clay too soft and difficult to hold its shape. Proper conditioning also improves adhesion between different colors and pieces. If the clay is hard or crumbly, conditioning will enhance flexibility and prevent breakage once baked.
Simple Techniques for Shaping
Start with basic shaping methods like rolling, pinching, and flattening. Roll the clay between your palms or on a flat surface to create smooth, round forms. Pinching helps create textures or to form curves by gently squeezing the clay between fingers.
Flattening the clay with a roller or your fingers produces flat surfaces or sheets for layering. Use simple tools such as toothpicks, clay shapers, or knives to refine shapes and add textures like lines or dots. Practicing these basic techniques builds control and precision.
Basic Sculpting Methods
Techniques such as coiling, layering, and carving are foundational for sculpting detailed objects. Coiling involves rolling thin ropes of clay and spiraling them for dimension. Layering adds thickness or creates patterns by stacking thin sheets.
Carving can be done using needles or blades to cut, etch, or remove clay for detail work. While sculpting, keep your hands clean to avoid transferring dirt or oils. Knowing when to blend edges or keep sharp lines defines the final look of your sculpture.
Building Core Skills
Mastering polymer clay requires attention to specific foundational techniques. These include how to blend colors effectively, produce smooth surfaces, and securely join different clay pieces. Mastering these skills will significantly improve the quality and appearance of your sculptures.
Blending and Mixing Colors
Blending polymer clay colors involves pressing and folding different hues together until the desired shade is achieved. Use small amounts of clay to control the blending process and avoid over-mixing, which can dull colors. When mixing, work on a clean surface and keep your hands clean to prevent unwanted color contamination.
A skinner blend is a common technique: stack thin layers of different colors, then roll and fold repeatedly to create smooth color transitions. This method gives a gradient effect useful for realistic models.
Keep in mind that some colors are more dominant; for example, adding a little red to white creates pink, but more subtle color blends require patience and practice to perfect.
Creating Smooth Surfaces
Smooth surfaces begin with soft, well-conditioned clay. Knead the clay thoroughly before shaping to remove lumps and air bubbles. Roll or press the clay evenly using a pasta machine or rolling pin with consistent pressure to maintain a uniform thickness.
To further smooth the surface, use tools like silicone-tipped shapers or soft brushes dipped in water or rubbing alcohol. Light sanding after baking can remove minor imperfections, but sanding between layers of glaze or varnish achieves the best finish.
Avoid fingerprints and rough textures by working on clean surfaces and using gloves or tools if necessary.
Joining Clay Elements
Joining pieces securely is essential to creating durable sculptures. Use soft clay for the joining surfaces by applying a thin layer of liquid polymer clay (or specifically designed clay glue) to increase adhesion.
Score both surfaces with a needle tool or toothpick before pressing them together to create texture that locks the pieces physically. Press firmly but gently, avoiding distortion of shapes.
For delicate joins, support the pieces during baking with foil or additional clay to prevent detachment. Proper joining ensures that parts won’t separate after curing, maintaining the integrity of the sculpture.
Baking and Curing Polymer Clay
Proper baking and curing of polymer clay require precise temperature control, timing, and care to avoid defects. Understanding how to select the right heat settings and methods protects your work and ensures durability. Monitoring the clay’s condition during and after baking is essential for achieving the best results.
Choosing the Right Temperature
Polymer clay typically cures between 265°F (130°C) and 275°F (135°C). Always follow the manufacturer’s instructions, as temperature can vary by brand and type. Using an oven thermometer helps maintain accuracy since many home ovens fluctuate by 10-20 degrees or more.
Setting the oven too low can result in undercured, soft clay. Too hot causes discoloration, brittleness, or burning. Some clays cure faster at higher temperatures but risk cracking. Generally, bake for 15-30 minutes per 1/4 inch (6mm) of thickness.
Avoid using toaster ovens or microwave ovens, as they often lack the precise temperature control required for polymer clay.
Preventing Burning and Cracks
To prevent burning, use an oven thermometer to monitor heat closely and avoid exceeding the recommended temperatures. Place clay on a ceramic tile or foil on a baking sheet to distribute heat evenly.
Cracking happens if the clay is baked too quickly, is too thick, or contains air bubbles. Roll out thick pieces thinner when possible, or bake in stages to allow heat to penetrate gradually. Avoid rapid cooling, which can also cause cracks; let pieces cool naturally inside the oven with the door slightly open after baking.
Avoid overhandling the clay immediately after baking because it can be fragile until fully cooled.
Testing for Proper Hardening
Test if the clay is fully cured by gently pressing a fingernail into a thick area; it should feel firm with no indentations. If it remains soft or flexible, additional baking may be needed, usually in 5-minute increments.
For larger or detailed pieces, wait 24 hours after baking before applying paint or glaze. If unsure about curing time, bake a small test piece first to compare hardness and flexibility.
Underbaked clay can break or deform later, while overbaked clay becomes brittle and prone to cracks or color changes.
Finishing and Protecting Your Sculptures
Proper finishing techniques enhance detail and improve durability. Using the right tools and materials can create a smooth, polished surface and protect your work from damage.
Sanding and Smoothing Techniques
Start sanding after the clay has fully baked and cooled. Use fine-grit sandpaper, beginning with 400 grit and moving up to 800 or 1000 grit for a smoother finish. Wet sanding can reduce dust and give a cleaner result.
Focus on areas with visible seams or rough patches. Small files or sanding sticks help reach tight spots and curved surfaces. Avoid aggressive sanding, which can damage delicate details or create uneven surfaces.
Buffing with a soft cloth or a commercial buffing wheel can give your sculpture a slight sheen. For very fine smoothing, microfiber cloths work well.
Applying Varnishes or Sealants
Choose varnishes specifically designed for polymer clay to avoid reactions that might cause stickiness or cloudiness. Both matte and glossy finishes are available, depending on the desired effect.
Apply thin, even layers using a small brush. Allow each coat to dry completely before adding another. Two to three coats are usually enough for good protection.
Avoid spray sealants unless labeled for polymer clay, as some can leave a rough texture or cause discoloration. UV-resistant sealants help prevent fading if the sculpture will be exposed to sunlight.
Common Mistakes to Avoid
Do not skip sanding after baking; rough surfaces can trap dirt or oils, reducing the lifespan of your piece. Avoid over-baking, which can make the clay brittle and prone to breakage.
Using incompatible paints or sealants can cause melting or softening. Always test on a small piece before applying to your sculpture.
Lastly, never apply varnish before sanding thoroughly; trapped dust will create a rough, dull finish instead of a smooth protective coat.
Project Ideas for Beginners
Starting with simple shapes and functional items lets you build skills while creating satisfying results. Focus on manageable projects that balance creativity with achievable techniques, allowing practice of sculpting, texturing, and baking.
Miniature Figures
Miniature figures are small sculptures that encourage precision and attention to detail. Begin with basic shapes like animals or cartoon characters, using simple forms such as spheres and cylinders.
Pay close attention to proportions. Use tools like toothpicks or fine sculpting tools to add texture and details such as facial features, fur, or clothing folds. Smaller pieces bake faster and reduce the risk of overcooking.
Color blending with polymer clay can enhance realism, allowing you to mix skin tones or fur shades. Avoid overhandling; too much pressure may deform shapes before baking.
Jewelry Pieces
Jewelry projects provide functional outcomes and a chance to practice shaping, layering, and baking thin clay sections. Start with simple earrings, pendants, or charms.
Use texture plates or stamps to create patterns on flat clay pieces. Combine colors using techniques like marbling or layering translucent clay for unique effects.
Incorporate metal findings such as eye pins, jump rings, and clasps before final baking to prepare ready-to-wear pieces. Ensure clay thickness is consistent to avoid cracking.
Plan designs with symmetry in mind for earrings, while pendants might allow more asymmetry or abstract shapes.
Home Decor Projects
Home decor items emphasize larger shapes and surface embellishments. Items like coasters, magnets, or small bowls offer practice in smoothing, texturing, and even combining mixed media.
Roll the clay evenly to prevent uneven baking or cracks. Use tools such as rolling pins and silicone mats for consistent thickness.
Experiment with surface details, including carving patterns or adding raised designs with separate clay pieces.
After baking, some pieces can be sealed with varnish for durability. Be mindful that thicker items require longer baking times at specified temperatures to thoroughly cure.
Tips for Improving as a Sculptor
Developing skill in polymer clay sculpting involves deliberate habit-building, drawing from diverse sources, and engaging with other creators. Growth comes from applying focused effort, seeking fresh ideas, and exchanging feedback.
Practicing Consistently
Set aside dedicated time daily or weekly to sculpt. Regular practice helps reinforce techniques and build muscle memory, which is crucial for detailed work.
Start with small, manageable projects to avoid feeling overwhelmed. Repeat simple shapes or forms until precision improves. Tracking progress by photographing work can highlight growth and areas needing focus.
Use experiments to understand material behavior, such as firing times and clay conditioning. Learning from mistakes accelerates mastery. Consistency over occasional sessions yields better results.
Finding Inspiration
Look beyond polymer clay to find ideas. Nature, sculpture, animation, and everyday objects can all trigger creative concepts.
Create an inspiration board using images, sketches, or color swatches. This visual reference aids in developing unique designs and refining style.
Pay attention to trends but prioritize personal vision over imitation. Inspiration should drive creation, not limit it. Note details that make sculptures compelling, such as texture or form.
Participating in Online Communities
Join forums, social media groups, or platforms specializing in polymer clay. These communities provide feedback, resources, and motivation.
Active participation can include sharing work, asking questions, and joining challenges or collaborations. This interaction exposes sculptors to diverse techniques and perspectives.
Respectful critique helps identify blind spots and encourages improvement. Follow experienced artists for tutorials and tips. Networking often leads to new opportunities and inspiration.