
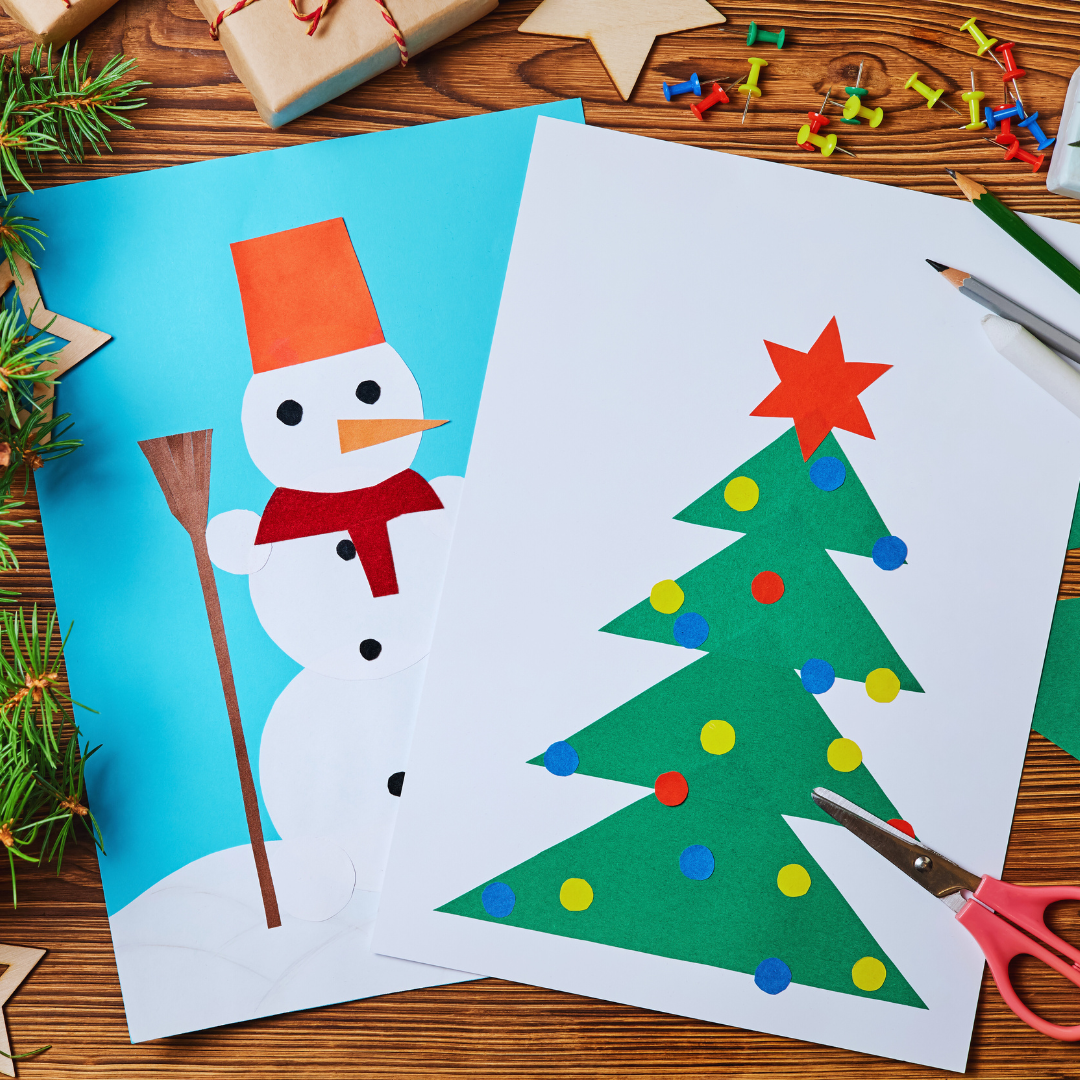
If you have limited time but want to tap into your creativity, quick crafts are the perfect solution. These projects are designed to be completed in one hour or less, making them accessible even for busy schedules.
Quick crafts combine simple materials with easy techniques to give you a finished product fast without compromising quality or fun. Whether you want to make home decor, gifts, or personal accessories, there are plenty of ideas that fit into a short time frame.
This guide will walk you through several practical crafts that you can start and finish within an hour, helping you make the most of your spare moments.
Essential Tools and Materials for Quick Crafts
Having the right tools and a well-organized space can drastically reduce project time. Efficiency comes from using reliable supplies and keeping everything accessible and ready before starting.
Basic Crafting Supplies
Start with versatile basics like scissors, glue, and tape. A quality pair of scissors can handle paper, fabric, and even thin plastic. Choose an all-purpose craft glue that dries quickly but holds firmly.
Keep a set of colored markers, pencils, and pens on hand for decoration or labeling. Small cutting tools like craft knives and rulers are essential for precise, clean cuts. Don’t forget reusable materials like felt, cardstock, and fabric scraps. These offer flexibility in many quick craft projects.
Always have double-sided tape for fast, mess-free bonding. Include paint brushes and acrylic paints if you plan to add color. Stocking these core supplies supports a wide range of one-hour craft activities.
Organizing Your Workspace
The organization minimizes time spent hunting for materials and increases focus. Use clear storage containers or drawers labeled by item type—separating adhesives, cutting tools, and decorations.
Keep everyday tools within arm’s reach on a desk organizer or pegboard. Having a small trash bin nearby helps maintain cleanliness and order during crafting. Arrange workspace lighting to avoid shadows in your project area.
For portable crafting, a small caddy with essentials allows quick setup and breakdown. Dedicate a flat, uncluttered surface as your main crafting zone. Consistent organization promotes faster completion of projects.
Time-Saving Tips
Prepare all materials before starting the craft—pre-cut shapes or pre-mix colors when possible. This avoids interruptions and keeps momentum going.
Use multi-purpose tools like scissors with built-in rulers or glue sticks for quick application. Invest in fast-drying adhesives to reduce wait times. Choose simple patterns and designs that require fewer steps.
Set a timer to stay aware of the hour limit and maintain focus. Avoid overcomplicating by limiting tools and materials to essentials. Efficient planning leads to successful quick crafts.
Easy Paper Crafts You Can Make in One Hour
Creating simple paper projects requires just a few supplies and some focused time. You can produce beautiful, functional items like cards, decorations, or gift boxes without complex tools. Each project emphasizes clear steps and achievable results within a short time frame.
Handmade Greeting Cards
Handmade greeting cards allow customization for any occasion. Start with cardstock, scissors, glue, and decorative elements such as stamps, washi tape, or markers. Cut the cardstock to a standard size (5″x7″ or 4″x6″) and fold it precisely.
Add layers or shapes for dimension. For example, use punched shapes like stars or hearts and arrange them neatly. Write or stamp clear, legible messages inside. Avoid complicated designs to keep the process under one hour.
Origami Decorations
Origami uses folding techniques with square paper to create various shapes like cranes, flowers, or stars. Begin with pre-cut origami paper or any thin, sturdy paper cut into 6″x6″ squares.
Follow step-by-step guides or diagrams focusing on basic models. Repeated folds and creases produce neat, symmetrical results. You can string several origami pieces together for a garland or place them in bowls as simple decor.
DIY Paper Gift Boxes
DIY paper gift boxes are practical and customizable. Use heavy cardstock or scrapbook paper for sturdiness. Templates are often available online, which simplifies cutting and folding processes.
Score all fold lines before assembly for clean edges. Use double-sided tape or glue for reinforcement at corners. Simple box sizes around 3″x3″ or 4″x4″ usually take 30-45 minutes to make. Finish with ribbons or stickers to personalize.
Fast Fabric and Sewing Projects
These projects focus on using fabric creatively while conserving time. Each idea can be completed with minimal tools and materials, making them accessible and practical.
Simple Tote Bags
Making a tote bag requires just fabric, scissors, thread, and a sewing machine or needle. Cut two rectangles of fabric, about 14 by 16 inches, for the main bag. Sew three sides together, leaving the top open.
For handles, cut two long strips of fabric, around 22 inches each. Fold, sew, and attach to the top edge of the bag. Reinforce where the handles join with multiple stitches.
Finished tote bags are useful for groceries or everyday items. Customize with colors or simple fabric paint designs to add personality. Total time: approximately 45–60 minutes.
No-Sew Crafts
No-sew fabric projects eliminate the need for a needle or machine. Use fabric glue, iron-on adhesive, or tying techniques. Cut fabric into shapes, then glue hems or edges for a clean finish.
Examples include fabric bookmarks, pillow covers with envelope closures, or fringe scarves tied at the ends. No-sew kits are useful for beginners or quick gifts.
Ensure edges are properly secured with glue to prevent fraying. Check drying times and handle items gently while setting, usually 15–30 minutes.
Quick Fabric Flowers
Fabric flowers add decorative flair to accessories or home decor. Use scraps of cotton, felt, or silk fabric. Cut circles or petals, then layer and sew or glue them at the center.
Use simple stitches or hot glue to attach beads, buttons, or small embellishments at the flower center. Attach finished flowers to clips, pins, or headbands.
Common techniques include rolling strips of fabric or folding petal shapes repeatedly for texture. This craft takes around 20–40 minutes, depending on complexity.
Creative Home Decor Ideas in Under 60 Minutes
Transforming your living space can be quick and affordable. Simple craft projects can add style and personality without needing much time or expensive materials.
Wall Art Projects
Create striking wall art using canvas, paint, and basic tools. Start with a blank canvas and choose geometric shapes or abstract designs for a modern look. Use painter’s tape to mark off sections, helping maintain clean lines.
Alternatively, make a collage from magazine cutouts or fabric scraps. Arrange pieces based on color or theme, then glue them onto a sturdy board or canvas. Frame the finished work for a polished appearance.
Both methods allow for complete customization, adapting easily to your existing color scheme.
DIY Candle Holders
Repurpose jars or glass containers into stylish candle holders. Clean the container thoroughly, then decorate with twine, lace, or paint for a textured finish. For a sleek look, wrap metallic tape around the base.
Add candles in varying sizes to create visual interest. Using scented candles can also enhance the ambiance in addition to improving decor. Always ensure flames are safely contained within the holder to prevent accidents.
This project requires minimal materials and provides immediate ambiance improvements.
Decorative Vases
Customize plain vases with simple yet effective techniques. Wrap vases in jute, yarn, or ribbon to introduce texture and color. Use hot glue for secure attachment, layering materials to create patterns.
Another option is to paint vases with chalk paint for a matte effect, then distress with sandpaper for a vintage vibe. Fill with fresh flowers or artificial arrangements, depending on preference.
These quick adjustments turn ordinary vases into focal points for any room.
Upcycled Crafts Using Everyday Items
Transforming common household objects into useful or decorative items saves money and reduces waste. Basic tools like scissors, glue, and paint can turn simple materials into creative projects with practical or artistic value.
Jar and Bottle Transformations
Glass jars and bottles can be quickly converted into organizers, lanterns, or planters. Clean and dry them thoroughly before use. Painting the outside with acrylic paint or using glass etching cream adds a personalized touch.
For storage, use jars to hold office supplies, kitchen spices, or craft materials. Attaching lids with hinges or fabric covers turns them into reusable containers. Bottles can be cut and repurposed as small vases or hanging lights with battery-operated string bulbs.
Safety tip: Use a glass cutter carefully or select bottles with wide openings for easier modification. Sealing the paint or decorations with a clear spray ensures durability.
Repurposed Containers
Old tins, plastic tubs, and cardboard boxes are versatile building blocks for craft projects. Clean containers work well as drawer organizers or small planters after adding drainage holes.
Wrap containers with fabric, paper, or washi tape to match decor. Cutting and folding cardboard boxes can produce gift boxes, desk organizers, or seed-starting trays. Label each container for better organization.
Using hot glue or double-sided tape simplifies assembly. Consider combining different sizes and shapes for a multi-tiered organizer or decorative storage solution.
Recycled Paper Crafts
Scrap paper, old magazines, and newspapers can be reshaped into bowls, baskets, or decorative wall art. Rolling strips of paper tightly creates sturdy coils for weaving or crafting.
Simple bowls are made by layering paper strips with glue on a mold. Paper beads, formed by rolling strips around toothpicks and sealing with varnish or glue, enhance jewelry projects.
Using origami techniques or paper cutting adds intricate designs. This approach minimizes waste and produces lightweight, colorful crafts suitable for gifts or home accents.
Fun Crafts for Kids and Families
These crafts focus on easy, hands-on activities that encourage creativity and collaboration. They require simple materials and can be completed quickly, making them perfect for family time.
Colorful Friendship Bracelets
Friendship bracelets use embroidery floss or yarn in various colors. Cut strands about 24 inches long and tie a knot at one end to form a loop. The basic knots to learn are the forward knot and the backward knot.
Children can create different patterns by alternating colors. Popular designs include stripes and chevrons. This craft develops fine motor skills and patience as kids practice tying consistent knots.
To finish, tie the loose ends around the wrist. These bracelets serve as personal keepsakes or gifts and foster a sense of accomplishment in young makers.
Imaginative Puppets
Puppets can be made using simple materials like paper bags, socks, or popsicle sticks. Decorate with markers, fabric scraps, googly eyes, and yarn for hair. Using glue and scissors, let children design faces and accessories.
This craft encourages storytelling and role play. Families can create characters together and put on puppet shows. Puppet-making promotes fine motor development and imagination.
For added fun, use a cardboard box as a puppet theater. This project can be done in under an hour with common household supplies.
Painted Rocks
Collect smooth, flat rocks from outside or purchase craft rocks. Wash and dry them before painting. Use acrylic paint or paint pens to create patterns, animals, or inspirational words.
Rock painting is suitable for multiple ages and allows creative expression with minimal mess. After drying, seal the rocks with a clear spray to protect the design.
Painted rocks can be left outdoors as kindness stones or used as paperweights and decorations. This craft is simple, inexpensive, and provides lasting results.
Quick Seasonal and Holiday Crafts
Creating quick, festive projects can instantly add charm to your home. Simple materials and a clear plan make it easy to craft items that fit the season or holiday mood.
Festive Wreaths
Wreaths made with natural elements like pinecones, fresh greenery, and berries bring a classic touch. Use a wire frame or a foam base as a foundation. Secure materials with a hot glue gun or floral wire for stability.
Add ribbons, small ornaments, or twinkling lights to give the wreath personality. For a faster option, use a pre-made grapevine base and embellish with seasonal accents. These wreaths can hang on doors or walls and usually take 30-60 minutes to complete.
Ornament Ideas
Handmade ornaments can be crafted from salt dough, felt, or clear glass balls that you fill with glitter, paint, or fabric scraps. Salt dough is affordable and easy to shape; after baking, paint and seal them for durability.
Felt ornaments require basic sewing skills but can be made quickly with templates. Clear glass ornaments offer customization by filling or decorating the inside, making each piece unique. Attach a simple string or hook, and your ornament is ready to hang.
Holiday Table Decor
Quick table decorations add warmth to holiday meals without complex setups. Use mason jars filled with fairy lights or pine sprigs for instant centerpieces.
Create napkin rings from twine and small pinecones or cinnamon sticks for a rustic feel. Place printed holiday-themed name cards for a personal touch. Most of these ideas take 15-30 minutes to prepare and use easily found items.
Tips for Finishing Crafts Quickly and Efficiently
Start by gathering all necessary materials before you begin. Having everything at hand saves time and prevents interruptions.
Set a timer to create a sense of urgency. This helps keep you focused and prevents overthinking small details.
Use simple techniques. Avoid complex steps that take extra effort unless they add significant value to your craft.
Organize your workspace to minimize distractions. A clean space helps you move smoothly from one task to the next.
Consider these quick-dry or no-dry adhesives to speed up bonding tasks:
| Adhesive Type | Drying Time | Best For |
| Hot Glue | 30 seconds | Fabric, paper, wood |
| Spray Adhesive | 1-2 minutes | Lightweight materials |
| Glue Dots | Immediate | Small decorations |
Work in layers or sections. While one part dries, start on another to maximize productivity.
Keep your tools sharp and clean. Dull scissors or brushes slow you down and reduce precision.
If possible, choose projects with minimal cleanup. This helps you finish your craft and your workspace faster.
Stick to a simple design or pattern. Elaborate details can extend your crafting time unnecessarily.